How to Burn Disney Plus Videos to DVD
DVDs are widely used for storing and viewing movies and other data. When you find some favorite Disney Plus videos and want to keep them forever, burning these videos to DVDs is a very recommended way. So what should you do if you want to burn streaming videos like Disney Plus videos to DVD?
Disney Plus is the streaming home of your favorite stories. With unlimited entertainment from Disney, Pixar, Marvel, Star Wars, and National Geographic, there's always something to explore. On Disney Plus, users can always watch the latest releases, original series and movies, classic films, and TV shows with new stories added every week.
Subscribers have access to unlimited downloads of shows and movies on the Disney+ app to watch offline later on up to 10 mobile or tablet devices, with no constraints on the number of times a title can be downloaded per year. Once these videos had been downloaded, subscribers can watch on the go and without an internet connection. All downloads are saved to a folder found in the app's bottom menu. However, the option to download content is only available on Disney Plus iOS or Android apps. In other words, you can't burn the videos downloaded through the app, so how can you burn the downloaded videos.
Part 1. Download Disney Plus Videos to MP4 format
Kigo DisneyPlus Video Downloader is a tool to help users to download movies or TV shows from Disney Plus and save them in MP4 or MKV format, and then you can burn the downloaded MP4 or MKV videos to DVD easily. Besides, all audio tracks and subtitle files can also be downloaded, and the subtitles can be stored as separate subtitle files.
Kigo Disney+ Video Downloader
- Download movies, and TV shows including original series from Disney Plus.
- Save Disney+ videos to MP4 / MKV format.
- Select some or the whole audio tracks and subtitles to keep.
- Download Disney+ HD videos.
- Support 5.1 audio kept.
- Save up to 75% time compared to screen recording type programs.
- Fast speed and easy to operate.
100% Secure
100% Secure
Whether you are a Windows user or a Mac user, click the download button above to download the version that's right for you. And then install it on your computer.
Please note that the software interface may be updated and we recommend checking the official tutorials for the latest instructions.
Step 1. Set output format and output video quality.
Run Kigo DisneyPlus Video Downloader on your PC, and log in using your Disney+ account to proceed. Then click on the Settings icon on the top right corner of the window to set the output format (MP4 / MKV), video quality (Low, Medium / High), and so on. Here we choose MP4 as the output video format.
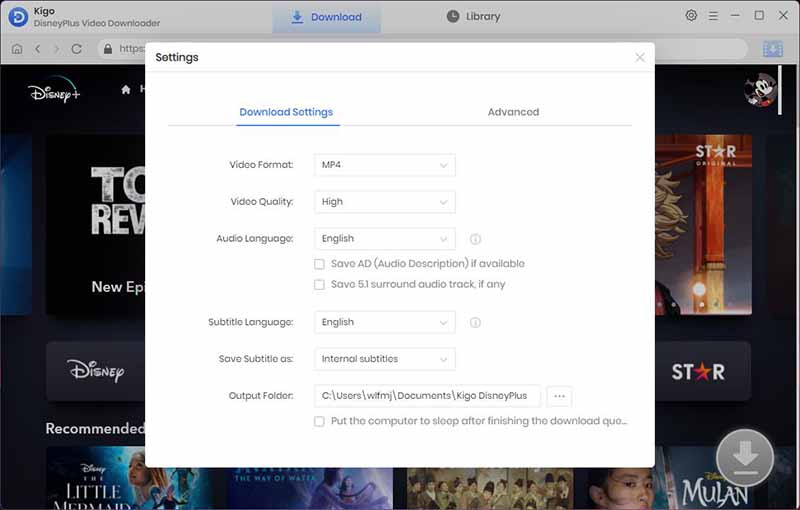
And you can also set the audio language, and subtitle language as you need. You can choose to save subtitles as internal subtitles, external subtitles, or hardcode subtitles, and select the video codec between H.265 and H.264.
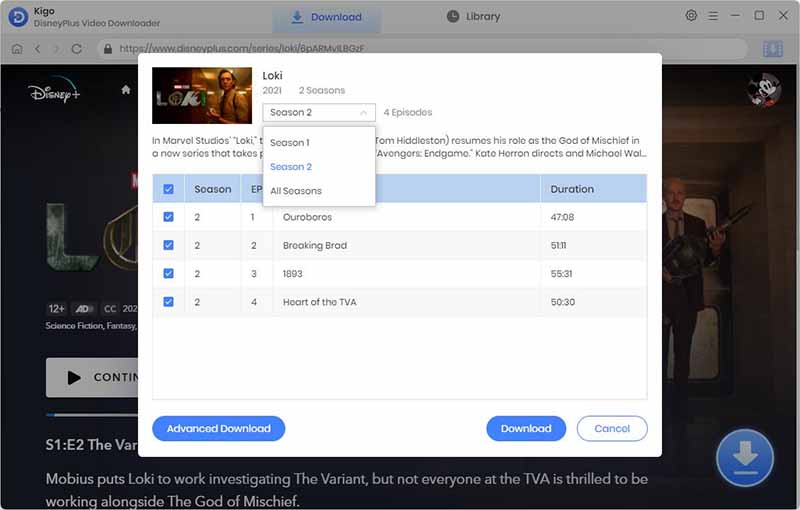
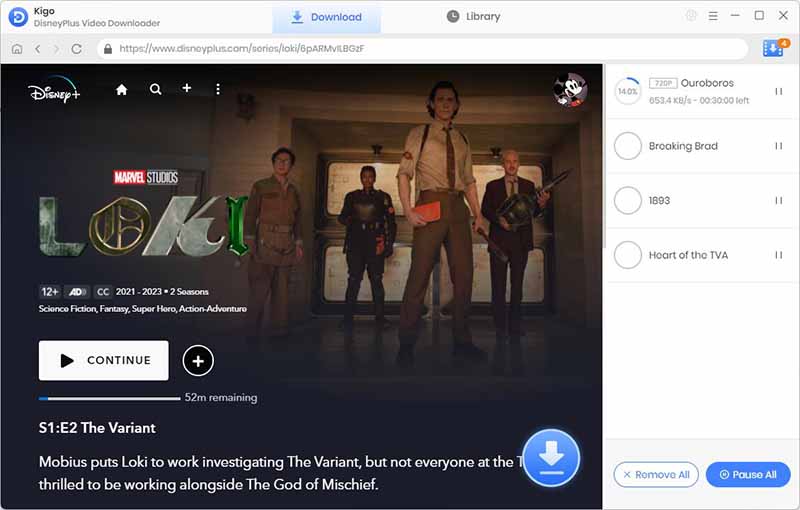
Step 2. Add Disney+ Videos to Kigo.
Kigo offers users different methods to add videos from Disney Plus to Kigo. You can browse to find the video you want to download, or use the video title to search and then add it to Kigo to download, or copy the Disney Plus video's link URL to Kigo.
Then open the video details page, and when you click the "Download" button, Kigo will automatically parse all the information about the TV series.
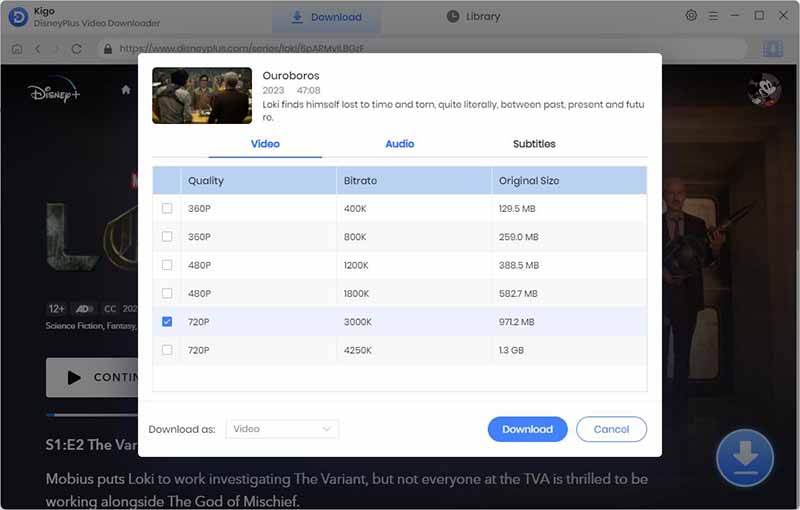
Step 3. Customize "Advanced Download" settings.
Click "Advanced Download" in the bottom left corner to select the video quality, audio track language and subtitle language.
Step 4. Start to download Disney+ video.
After you complete the above settings, you can click the "Download" button to start downloading Disney+ video.
Part 2. Burn Downloaded Disney Plus Videos to DVD
After the downloading, you can click "Library" - "Folder icon" to locate the downloaded videos directly. Here we recommend you two methods to burn videos to DVD.
Method 1. Use Windows Media Player to burn videos to DVD
Most computers running Windows have Windows Media Player installed. You can use Windows Media Player to burn the downloaded Disney Plus videos to DVDs directly.
- Open Windows Media Player by clicking Start, pointing to All Programs, and then clicking Windows Media Player.
- Click the Burn tab, and then click the Burn options arrow to see more options.
- To burn video or a large amount of music, click Data CD or DVD. This kind of disc may not play on all devices.
- Open the disc drive, insert a blank DVD, and close the drive. If the AutoPlay dialogue box opens, close it.
- If your computer has multiple drives, click the Burn Options menu, click More burn options, and then click the Devices tab to select the drive you want to use.
- If there is already media under the Burn tab, click Clear list to empty the current burn list.
- Drag the videos that you want to burn from your media library to the list pane on the right side of Windows Media Player.
- To burn the media, click Start Burn. This may take a few minutes. Don't open the disc drive until the burn process for that disc is complete.
Method 2. Use Any Video Converter Free to burn videos to DVD
To burn the downloaded Disney Plus movies or TV shows to DVD Disc, Here recommend one free DVD Burner - Any Video Converter Free.
First of all, go to download and install Any Video Converter Free on your PC, and then run it.
Step 1. Load the Downloaded Amazon Video.
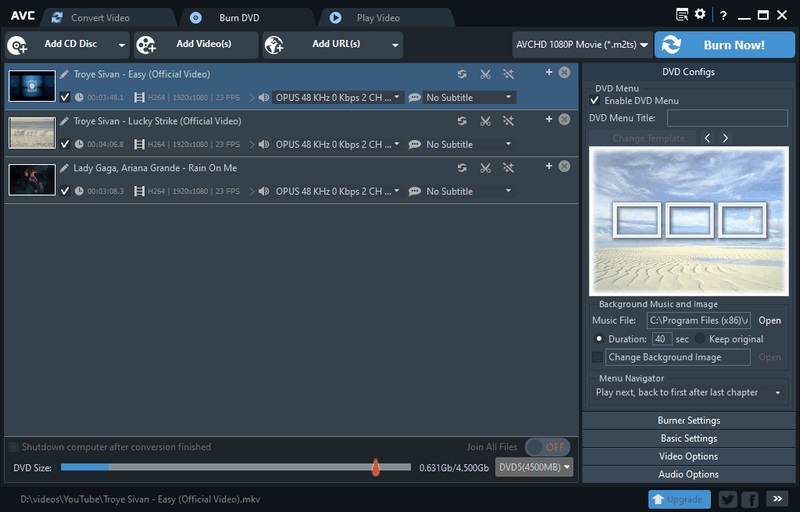
Put a blank DVD or Blu-ray Disc to the computer. On Any Video Converter Free, click on the "Burn DVD" tab, then click the "Add Video(s)" button. Press Ctrl or Shift to select more than one video at one time in the file folder. Or click on the "Menu" button in the upper right corner of the main window and choose "File" > "Batch Add Video Files" to add video clips from single or multiple folders.
After you add the downloaded Disney Plus videos, they will be displayed on the middle panel with their detailed information (duration, format, video codec and size, etc).
Step 2. Choose the Output Format.
After uploading Disney Plus videos, on the upper right, choose DVD video NTSC Movie or DVD video PAL Movie according to your TV system; And AVCHD Movie according to your DVD player.
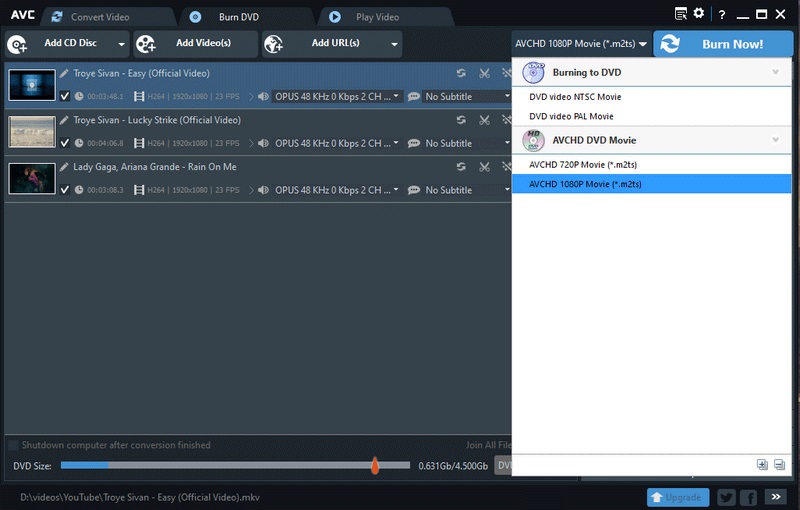
Tips: AVCHD DVDs can be only played on a Blu-ray player or DVD player that supports AVCHD DVD playback.
Step 3. Start to Burn Disney Plus Videos to DVD
Click on the "Burn Now!" button to start burning Disney Plus videos to DVD. Once completed, click the "OK" button to eject your disc.
Conclusion
After you burn Disney Plus to DVD, you can play Disney Plus videos anytime you like. And you can also keep these videos as long as you like. There is no need to worry about the videos' leaving as well.
Please note that only the first 5 minutes of each video can be downloaded with the trial version, please purchase a license to enjoy the full video. It is suggested that to download the trial version and have a test before purchasing it.
![]() Purchase for Win
Purchase for Win
![]() Purchase for Mac
Purchase for Mac
100% Secure
100% Secure
Useful Hints
Kindly be aware that the trial version allows downloading only the initial 5 minutes of each video. To fully enjoy the complete video, we recommend purchasing a license. We also encourage you to download the trial version and test it before making a purchase.
Videos from Disney™ are copyrighted. Any redistribution of it without the consent of the copyright owners may be a violation of the law in most countries, including the USA. KigoSoft is not affiliated with Disney™, nor the company that owns the trademark rights to Disney™. This page is provided for compatibility purposes only, and in no case should be considered an endorsement of KigoSoft products by any associated 3rd party.


Ashley Rowell, a senior staff writer, is an expert in video and audio subjects, specializing in streaming video and audio conversion, downloading, and editing. She has a deep understanding of the video/audio settings for various devices and platforms such as Netflix, Amazon Prime Video, Disney Plus, Hulu, YouTube, etc, allowing for customized media files to meet your specific needs.