Shortcut to each function
Key Features
Installing of Kigo Video Converter Pro
How to Convert video
How to edit the video
How to adjust properties
How to Burn DVD
How to Download video
Manage Tasks
Preferences
Buy and register
Technical Support
Welcome to Kigo Video Converter Pro!
Thank you for using this product!
As a combination of Video Converter, DVD Creator, DVD Creator and Web Video Downloader application, Kigo Video Converter Pro helps you convert your favorite DVD movies and videos for playing on portable video media devices like iPod, iPad and iPhone. Similarly, they can be made into DVD disc or DVD Folder with DVD menu.
Kigo Video Converter Pro is designed with various powerful functions to edit your video files. This all-in-one Video Converter for Mac lets you split movies into segments, merge files to one file, clip video short, crop video size, set video effects, and even add watermark onto your movies.
With Kigo Video Converter Pro, you can easily put your videos on your mobile devices and enjoy them anywhere. It's simply a tool designed to make your life better.
Key Features
Converting
- Most video formats are supported
- Work for many popular video players
- Save video as your desired parts and formats
- Add subtitles to video
- Extract audio from video
- Clip video short, crop video size, edit video effects and add watermark
- Trim video clips and merge video segments into one file
- All DVD formats are supported
- High output quality and easy to use
Burning
- Detect disc capacity automatically
- Support for single and double burner
- Provide users with diversified DVD Menu Templates
- Preview the original and output Menu before you create DVD with a built-in player
- Customize aspect ratio of the video
- Support burning to DVD folder, image (.iso) and DVD disc
Downloading
- Download videos from multiple web sites
- Auto convert downloaded video
- Download videos from Youtube with different resolutions and subtitles
Task
- Counting the tasks
- Separate pending and history tasks
- Shut down or sleep the device after pending tasks finished
- Preview and screenshot history tasks
- Upload history videos to the YouTube web site
- Quickly start conversion from history tasks
2 Installing of Kigo Video Converter Pro
2.1 System requirements
- OS Supported: Mac OS X 10.7.x, 10.8, 10.9 or later
- Processor: 1G Hz Intel, or above
- Physical RAM: 512M or more
2.2 Installation
Step 1: Download the installation package for Kigo Video Converter Pro from the download button.
Step 2: Double-click "KigoVideoConverterPro-INTEL.dmg" to start installation.
Step 3: Follow the instructions to finish the installation.
Step 4: When you see a window where there is an icon of Kigo Video Converter Pro, drag and drop the icon onto the desktop. Then you can just run the program from the desktop icon.
3 Convert video
3.1 How to convert videos
Step 1: Load Video/ DVD files
Click the Add File(s)/ Add DVD button (Also through the menu item File-> Add File(s)/ Add DVD or drag files to the list directly from your disc or other location) to select the files you want to import.
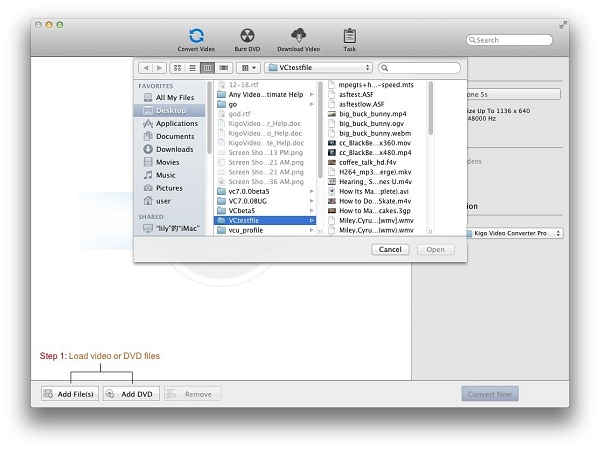
Tips 1:
This powerful Video Converter supports almost popular video formats except MTS, MOD, M2TS, TS and TP.
Tips 2:
It provides 2 extraction modes so that you can import and convert the main DVD movie or import all titles to convert. You can
choose the one which you like in the preferences settings. Open it through Menu->App name->Preferences:
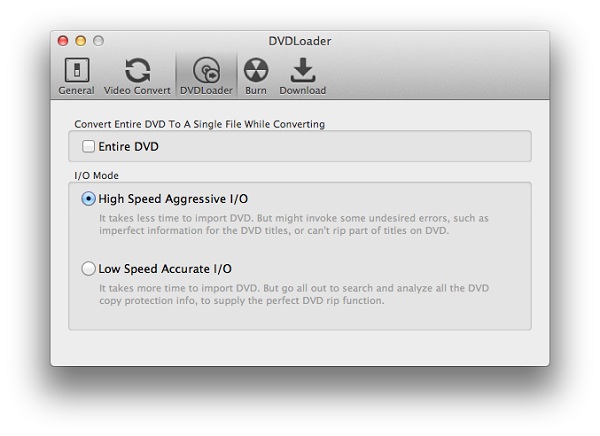
Convert Entire DVD To A Single File While Converting:
Check on: It will only import the main DVD movie to the converting list when you import a DVD.
Clear it: It will import all titles of the DVD to the converting list when you import a DVD.
I/O mode:
High Speed Aggressive I/O -> The default I/O mode. It will load DVD with high speed.
Low Speed Accurate I/O -> It will load DVD more accurately, but it spends more time to load DVD compared to High Speed
Aggressive I/O mode.
Note: If the program can't load some DVDs successfully by High Speed Aggressive I/O mode, such as titles missing, duration misjudgment. You'd better change the mode to Low Speed Accurate I/O and load these DVDs again.
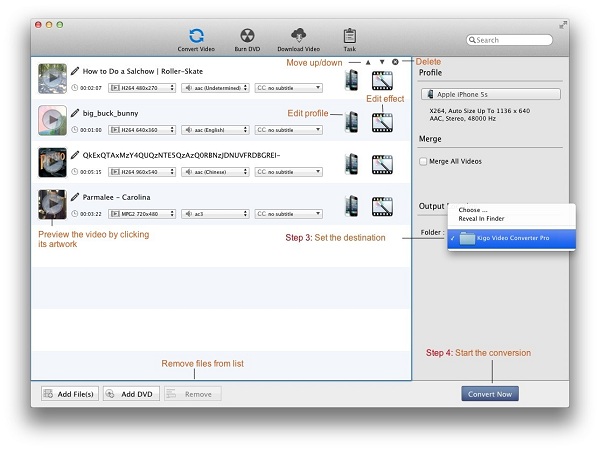
Step 2: Set the profile
Click the required profile in Profile drop list on the main interface including all kinds of video and audio profile.

After selection, the selected format will be set for all files on the list.
Tips: The software supports decoding and encoding of multiple audio and video formats and conversion for iPod, iPhone, PSP, PS3, Apple TV, PSP, Zune, Creative Zen, Archos etc.
Step 3: Set the destination
Click the Output Location - Folder drop list and then click Choose�� to set the destination.
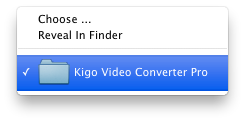
Tips: The default path is / Users/ user/ Movies/ Kigo Video Converter Pro, click Reveal In Finder could open the path.
Step 4: Start the conversion
Click the Convert Now button and then list is empty.
Meanwhile all of the files on the list are added to the Task - Pending - Converting list starting the conversion in turn and the countdown begins.
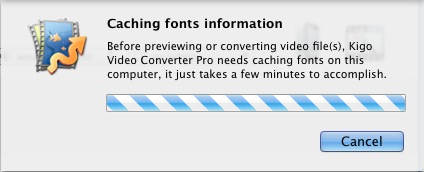
Tips: When previewing or converting for the first time, the application needs Caching fonts information on this computer firstly.
Step 5: Finish the conversion
After the conversion is done, it will be deleted form Task - Pending - Converting list, and then added to Task - History - Converted list.
3.2 How to edit the video
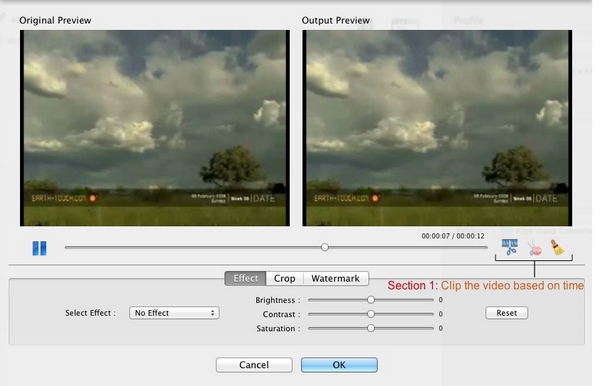
Click Edit effect icon to open the effect window and play video automatically in the Original Preview and Output Preview without any effects.
Section 1: Clip the video based on time.
When the video is playing, click start time icon to clip the video based on time by blue marker. And then click the available end time icon to complete the clip. When click reset icon, the blue marked clip will be deleted from playback progress bar.
Tips:
1. When the video is paused, it doesn't support clip.
2. You can restart clip the video by click start time when a clip completed. And the prior one will be
removed.
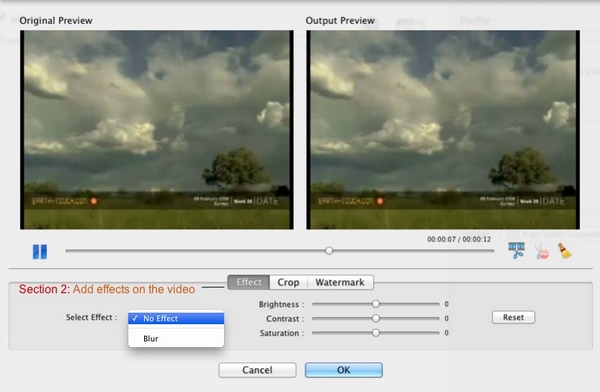
Section 2: Add effects on the video
1. Click Select Effect drop-list to set No Effect or add the effect such as Blur on the video.
2. Drag the value sliders to adjust Brightness, Contrast and Saturation.
3. Click Reset button to cancel the Effect settings on the video.
Section 3: Crop the video based on viewfinder
Check on Enable Crop and then the crop frame will show up in the Original Preview window. The Output Preview will display the pictures from viewfinder. When Checking on Enable Crop, click the drop-list to set the Zoom Type such as Letter Box, Keep Original, Force Scale, 16:9 and 4:3.
And you can add other effects by checking on Mirror and Flip.
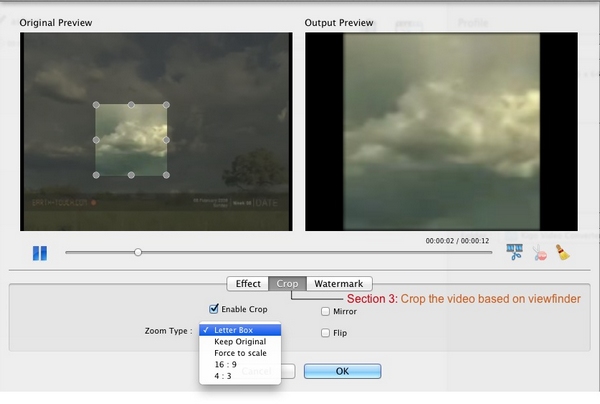
Tips:
1. Drag and resize the crop frame can custom the viewfinder.
2. Changing the cropped and effects is independent with each other.
Section 4: Add watermarks on the video
Click Watermark Type drop-list to set No Watermark or set watermark with Image Watermark or Text Watermark.
Set Image Watermark: Click the available �� button to add Watermark Content and then drag the available slides to adjust Opacity.
Set Text Watermark: Input the text in the Watermark Content and click the available �� button to set the font. Then drag the available slides to adjust Opacity.
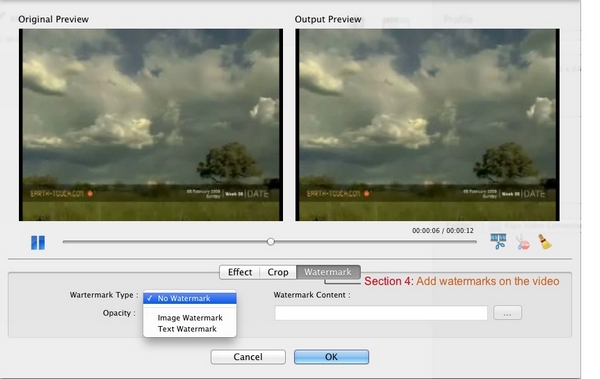
Tips:
1. You can drag and resize the watermark in the Output Preview window.
2. Changing the Watermark Type will remove the watermark that has been added.
Note:
1. All effects produced from Effect, Crop and Watermark will be both displayed in the Output Preview window.
2. Changing the Clip, Effect, Crop and Watermark is independent with each other.
3.3 How to adjust properties
Section 1: Adjust parameters of the profile
Click Edit profile icon to adjust parameters of the profile according to you requirements, you can also keep the defaults.
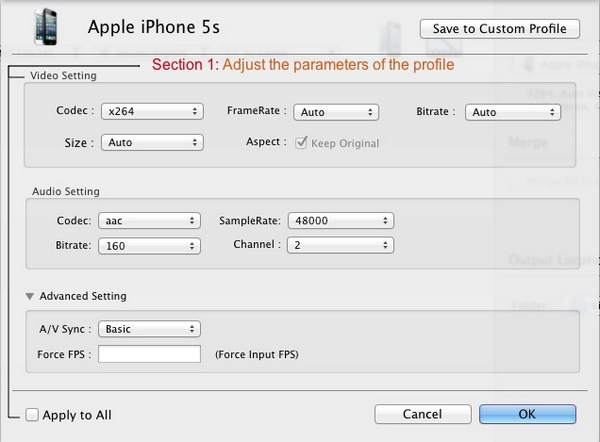
Tips: When checking on the option Apply to All, your Profile / Video / Audio / Advanced customized settings will apply to all files in the Convert Video list.
Section 2: Custom profile
In the profile parameters window, click Save to Custom Profile button to customize profile.
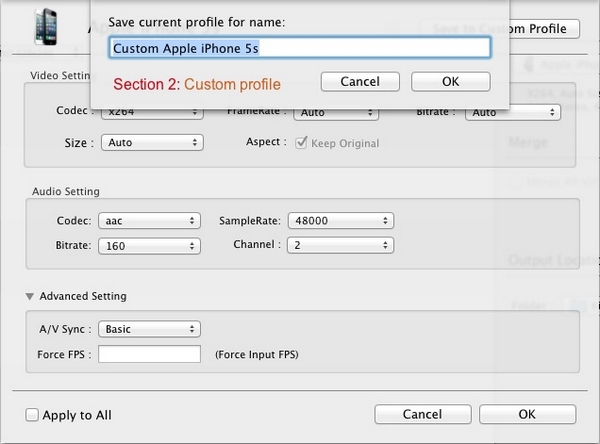
Typing the name of the new profile in pop-up window, and you can also keep the defaults. Then the customized profile is added to Customized Video category. It could be deleted from Profile list by clicking "-" icon.

Section 3: Customize name
Click the modify icon to customize the name of the output file unless it is not added to Task.

Section 4: Adjust parameters of the video
The parameters of the video include video, audio, and subtitle. Click the drop list to adjust the parameters.
In addition, you can add an extra subtitle (srt, ass, ssa, smi subtitle formats supported) into the video by clicking add subtitle.
Section 5: Merge all videos
When checking on Merge All Videos, you can merge multiple files into one.
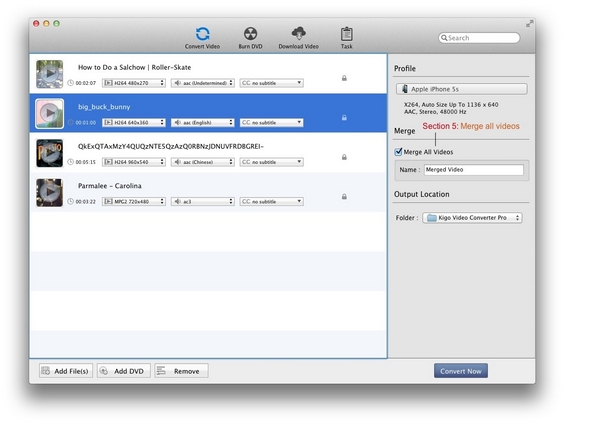
Tips:
1. One file does not support being merged.
2. The videos of merge video can freely add, delete, sort and preview.
3. The videos of merge video can't customize profile separately.
4. The merge video doesn't support edit video.
3.4 How to save a frame from the video
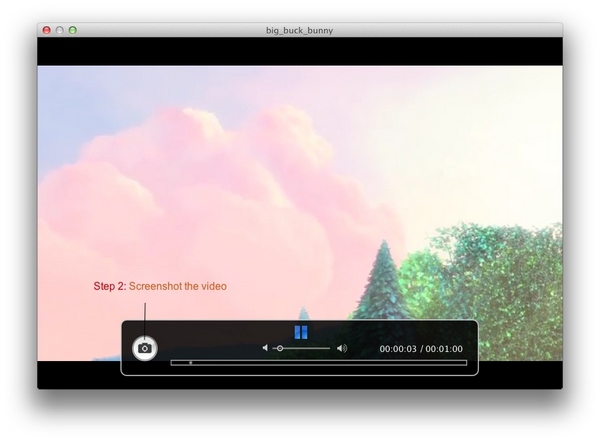
Step 1: Preview the video
Click the play button at artwork of each file to let you preview the video. Then a preview window pops up.
At the bottom of the window, a menu bar with play button, sound button, screenshot button, progress bar and time parameters can help you preview video better.
Step 2: Screenshot the video
Click the screenshot button on the menu bar, then a frame from the video will be saved to the default path "/ Users/ user/ Pictures/ Kigo Video Converter Pro" with ". png" format.
4 Burn DVD
4.1 How to write video on a disc
Step 1: Add videos
Click the Add button (Also through the menu item File-> Add File(s) to Burn DVD or drag files to the list directly from your disc or other location) to select the files you want to import.
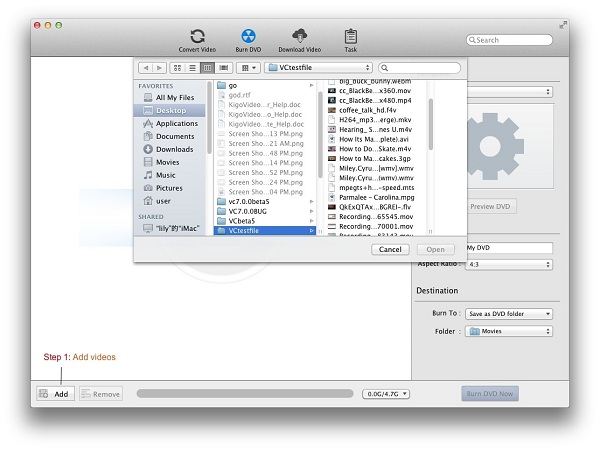
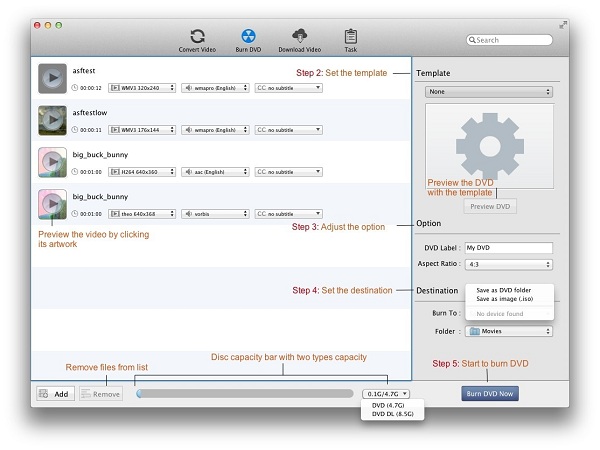
At the bottom of the Burn DVD window, disc capacity bar with two types capacity (DVD 4.7G, DVD DL 8.5G) displays different status according to the size of the added files. When no file added, disc capacity bar is blank. After adding files, Green represents plenty of space, yellow is running out of space, and red is warning the available space has been exceeded.
Tips: The videos in the list can freely add, delete, sort and preview.
Step 2: Set the template
Click Template drop-list to set a template as DVD menu for self-made DVD files. The selected template will be displayed in the below window. And then click Preview DVD button, the DVDPreview window pops up with added files, next / previous button and play button.
Tips:
1. If Template is None, it doesn't support to preview DVD.
2. If no file added, it also doesn't support to preview DVD.
3. Next / previous button displays according to the number of the added files.
4. Click play button or click the file in the DVDPreview window to play the video.
Step 3: Adjust the option
DVD Label: The default name is My DVD. Or customize it.
Aspect Ratio: Setting the aspect ratio of the video, such as 4: 3 or 16: 9.
Step 4: Set the destination
Burn To: Setting the output type. Including Save as DVD folder, Save as image (.iso), when DVD device is detected, you can check it to save files in DVD disc.
Folder: Click the Destination- Folder drop list and then click Choose "..." to set the destination.
Tips: The default output directory is / Users/ user/ Movies, and click Reveal In Finder to open the path.
Step 5: Start to burn DVD
Click the Burn DVD Now button and then progress bar pops up.
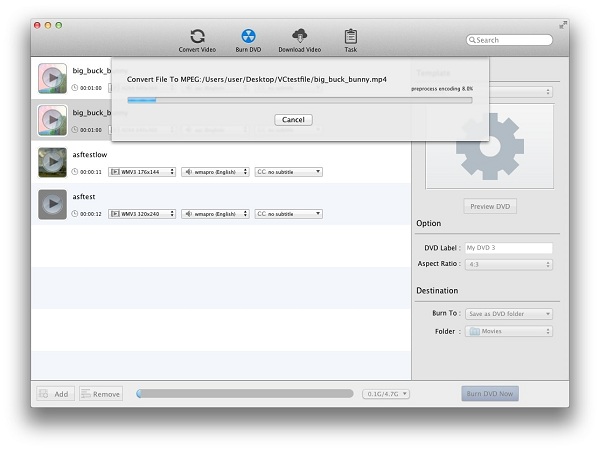
Tips: You are unable to operate other functions temporarily, before the completion of burning.
Step 6: Finish burning DVD
After the burning is done, it will be deleted form burning list, and then added to Task - History - Burned list.
5 Download video
5.1 How to download video from the Internet
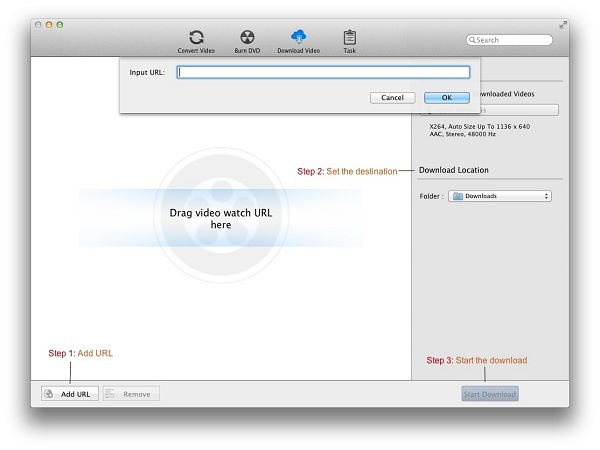
Step 1: Add URL
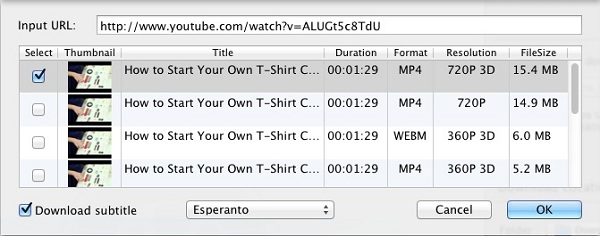
Click the Add URL button and then Input URL window pops up. Input or paste the URL to add the URL you want to import. After parsing successfully, the file will display in the Download Video list. Also through the menu item File-> Add URL or drag URL to the list directly.
Tips:
1. Support 22 script download sites below.
- http://www.break.com
- http://www.comedycentral.com
- http://www.dailymotion.com
- http://www.facebook.com
- http://www.howcast.com
- http://www.liveleak.com
- http://www.metacafe.com
- http://www.movieclips.com
- http://www.mtv.com
- http://www.mtvhive.com
- http://www.photobucket.com
- http://www.southparkstudios.com
- http://www.thedailyshow.com
- http://www.tudo.com
- http://www.veoh.com
- http://www.vevo.com
- http://www.vimeo.com
- http://www.youku.com
- http://www.youtube.com
- http://www.myvideo.de
- http://www.nicovideo.jp
- http://www.rutube.ru
2. After you add URL that comes from http://www.nicovideo.jp, you must login to download.
Step 2: Set the destination
Click the Download Location- Folder drop list and then click Choose "..." to set the destination.
Tips: The default path is / Users/ user/ Downloads, click Reveal In Finder to open the path.
Step 3: Start the download.
Click Start Download button and then list is empty. Meanwhile all of the files on the list are added to the Task - Pending - Downloading list starting the downloading in turn and the countdown begins.
Step 4: Finish the download
After the download is done, it will be deleted form Task- Pending- Downloading list, and then added to Task - History - Downloaded list.
Tips:
When downloading videos from Facebook, Howcast, Liveleak, Movieclips, Vimeo and Youtube, you can choose different Format, Resolution to download. But only Youtube supports to choose Download subtitle.
5.2 How to auto convert downloaded video
Firstly, make sure the Auto convert downloaded video is checked and the Profile is set before the Step 3 in the download process.
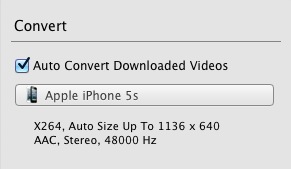
Then the downloaded file will also be added to Task - Pending - Converting list at the same time in the Step 4. So the downloaded file is automatically converted. And then the auto convert downloaded file will also be added to the Task - History - Converted list.
6 Manage Tasks
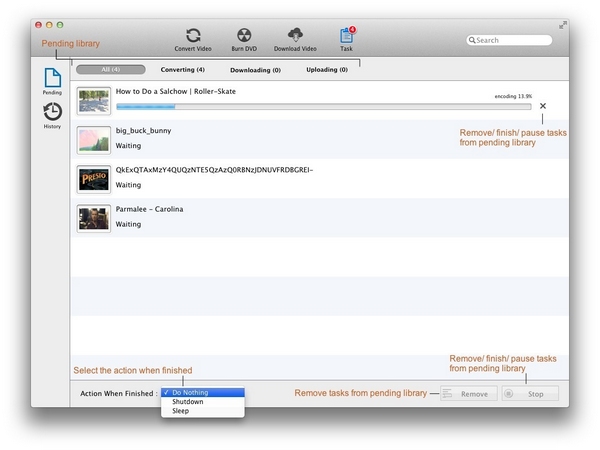
6.1 Pending library
File library
All: Showing up all of the files in the Converting, Downloading and Uploading library by the date added.
Converting: All files which are converting or waiting for converting will show up in the main file list whenever you click
this library.
Downloading: All files which are downloading or waiting for downloading will show up in the main file list whenever you click
this library.
Uploading: All files which are uploading or waiting for uploading will show up in the main file list whenever you click this
library.
Other Options
Action when finished: You can set Do Nothing, Shutdown or Sleep.
Remove: You can remove files from list by clicking Remove button.
Stop: In Converting library, click Stop button to remove convert files. In Downloading and Uploading
library, click Stop button to pause the download and the upload. And then the Stop button changes to the Start button
that can restart the download and the upload.
Tips: The function of the deleted icon  at the end of the file is the same to the Stop button.
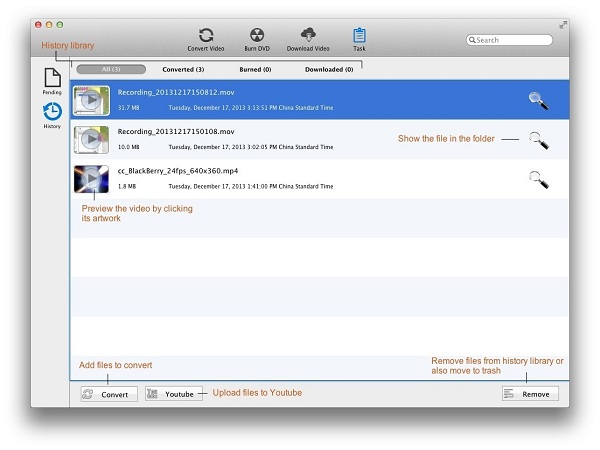
6.2 History library
File library
All: Showing up all of the files in the Converted, Burned and Downloaded library by the date added.
Converted: All files which finished the conversion will show up in the main file list whenever you click this library.
Burned: All files which finished the burning will show up in the main file list whenever you click this library.
Downloaded: All files which finished the download will show up in the main file list whenever you click this library.
Other Options
Youtube: You can upload the converted file to Youtube by clicking this button. And make sure you have to login first.
Convert: If you want to convert the file listed in library, just select it and click this button. And then the file is
added to the Convert Video list.
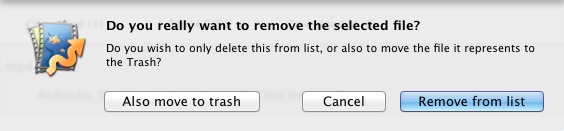
Remove: You can remove files from list or also remove to trash.
Reveal in finder: You can find the target file in folder by clicking the magnifier icon
 .
.
Tips:
1. If the output doesn't exist, the title of the file in the History library will turn red.
2. The audio files in Converted library, the files in Burned library and the red title files don't support the
function of Youtube and Convert.
7 Preferences
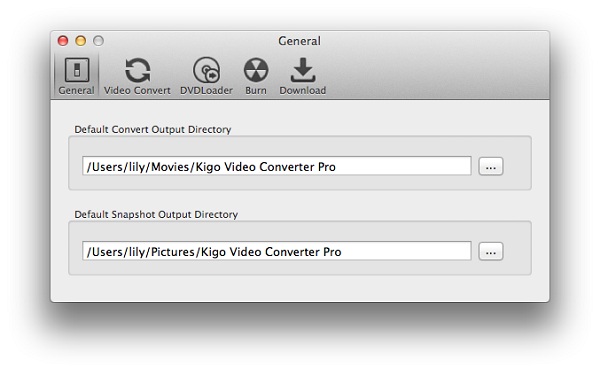
7.1 General Tab
Default Convert Output Directory
The default value is / Users/ user/ Movies/ Kigo Video Converter Pro. You can customize the output directory by clicking the "..." button.
Default Snapshot Output Directory
The default value is / Users/ user/ Pictures/ Kigo Video Converter Pro. You can customize the output directory by clicking the "..." button.
7.2 Video Convert Tab
Customize settings before converting
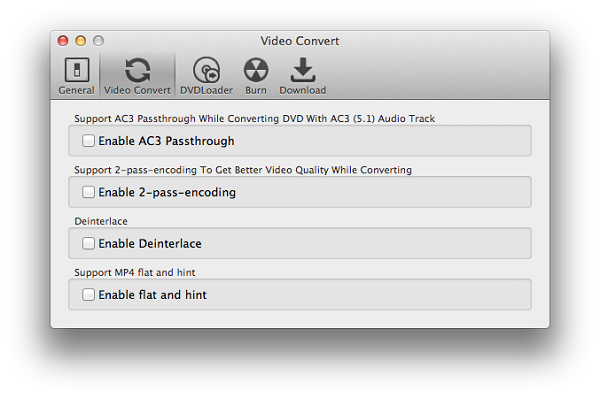
Enable AC3 Passthrough: Enable AC3 Passthrough while converting DVD with AC3 (5.1) Audio track or not.
Enable 2-pass-encoding: Support 2-pass-encoding to Get Better Video Quality while converting or not.
Enable Deinterlace: Deinterlace or not.
Enable flat and hint: Support MP4 flat and hint or not.
7.3 DVDLoader Tab
Convert Entire DVD To A Single File While Converting
Check on: It will only import the main DVD movie to the converting list when you import a DVD.
Clear it: It will import all titles of the DVD to the converting list when you import a DVD.
I/O mode
High Speed Aggressive I/O -> The default I/O mode. It will load DVD with high speed.
Low Speed Accurate I/O -> It will load DVD more accurately, but it spends more time to load DVD compared to
High Speed Aggressive I/O mode.
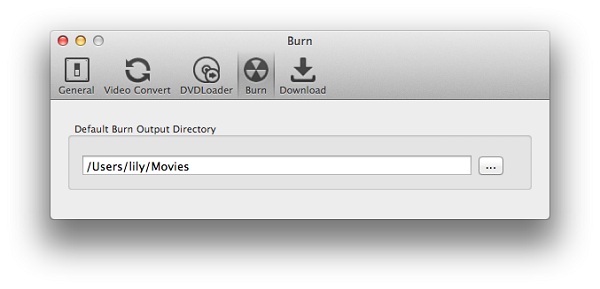
7.4 Burn Tab
Default Burn Output Directory
The default value is / Users/ user/ Movies. You can customize the output directory by clicking the �� button.
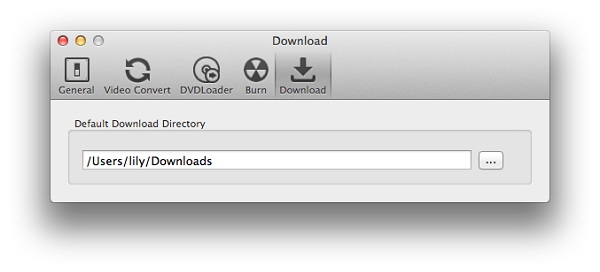
7.5 Download Tab
Default Download Directory
The default value is / Users/ user/ Downloads. You can customize the output directory by clicking the �� button.
8 Buy Kigo Video Converter Pro
8.1 Buy a registration code
Quick Link: To buy a license key for Kigo Video Converter Pro, visit our online store.
Why should I buy Kigo Video Converter Pro?
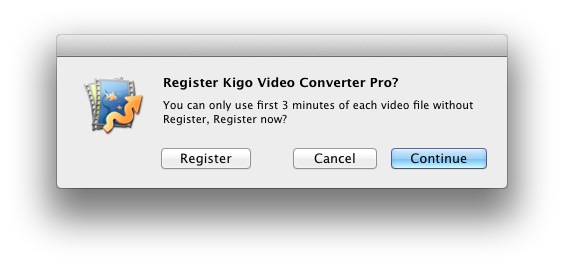
Put simply, Kigo Video Converter Pro is a shareware. The trial version has the limitations.
1. In trial version, you can only convert 3 minutes for each file at most.
2. In trial version, when you convert the merged video, each sub video will only be converted 3 minutes at most.

3. In trial version, when you burn DVD, each sub video will only be converted 3 minutes at most.
After you purchase our product, we will provide you with Registration Name and Registration Code that will unlock the trial version limitation.
What Benefits do we have after Registration
- Unlimited use with any time and function.
- FREE upgrades when the updated versions of the same product released.
8.2 Registration
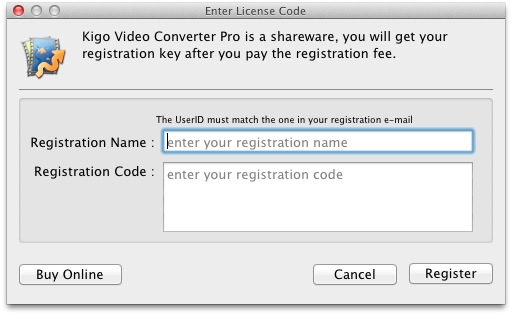
Step 1: Run Kigo Video Converter Pro, then click the Kigo Video Converter Pro menu, and select the Registration... option.
Step 2: After the registration box popped up, please fill the input blanks with Registration Name and Registration Code. You can also use Command + C to copy and Command + V to paste in the window.
Notice:
1. Make sure that the Registration Name and Registration Code both are provided by our company after you pay the
registration fee. If you have not paid, please click Buy online to purchase.
2. Make sure the Registration Name and Registration Code you enter are both complete and correct, if not, you will
get an error message.
Step 3: After you finish registration successfully, the limitation of Kigo Video Converter Pro's trial version will be removed.
9 Technical Support
9.1 Contact us
Go to Kigo Video Converter Pro HomepagePlease visit our online store to buy Kigo Video Converter Pro.
9.2 Support
If you have any problems, please contact us. We will help you as soon as possible. Thank you!
Support E-Mail: [email protected]